Creating a Virtual Environment
TLDR: A virtual environment is used to create an isolated folder that contains the necessary executables and packages that our project would require.
Before we start coding, let’s define our pipeline system’s folder structure:

First, we clone the Piper git repository in the "/vfxpiper" directory:
Alternatively, we could have manually downloaded the Piper archived repository and extracted it in the Piper installation directory.
We need and a virtual environment to run our code in, so that our Python interpreter and all the modules and packages we install will be isolated and will remain specific to the Piper development environment. This way we can avoid any conflicts with any other Python versions and packages that have been installed globally on our operating system. We would also have a much easier time testing and deploying our pipeline system with all of its dependencies neatly organized in a single virtual environment.
I'll do my best to avoid any operating system-specific syntax for using the terminal to set up a virtual environment, but the key steps required are:
- Making sure you have virtualenv for Python3.4 installed;
- Navigating to the Piper installation directory;
- Using the virtualenv command to initialize a virtual environment;
An OS agnostic alternative is to take advantage of PyCharm’s convenient Project Interpreter configuration. In PyCharm, I'll go to File -> Settings, and click on the gear icon next to the Project Interpreter field to select “Create VirtualEnv”. In the “Create Virtual Environment” window, I'll set the location to my “/vfxpiper” installation directory, appending “venv” at the end - this is where all virtualenv files (project Python interpreter and related packages) will be stored. I’ll also make sure my “Base interpreter” is set to Python 3.4, the standard for this project.

The virtual environment is now all set, PyCharm should automatically detect and activate it every time I open my piper project in the IDE. Now we can start installing all the Python packages required for developing the pipeline system. In the same “Settings” window, let’s click on the plus-shaped “Install” icon and add the following (please note the specific package versions):

A convenient alternative, which I often employ, is to use the command line to install the required packages from the /piper/requirements.txt file included in the Piper git repo.
So here is how my project structure looks like inside of PyCharm:
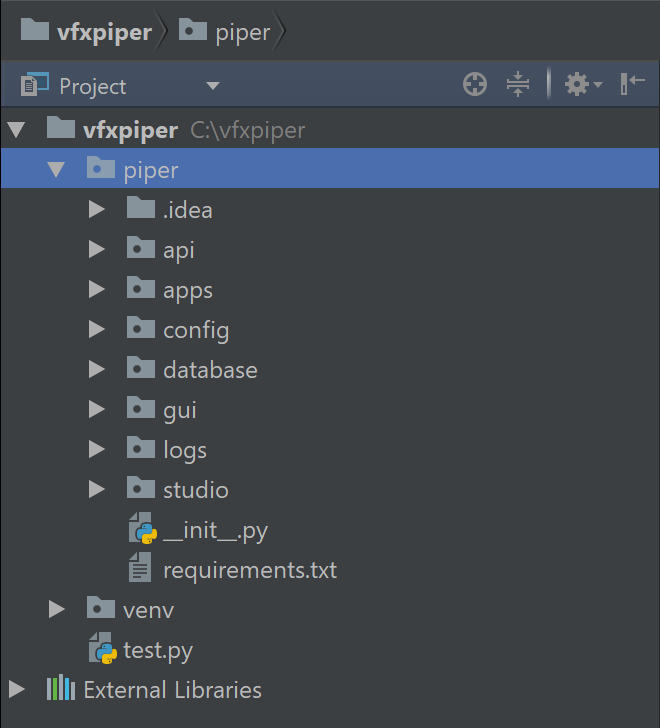
Up next, now that our environment is properly set up, it’s time to write some pipeline code!
Comments
Post a Comment